Building an Emergency Kit: A Step-by-Step Guide to Safety and Survival

In recent years, natural disasters such as hurricanes, earthquakes, and wildfires have become more frequent and severe. Moreover, the ongoing pandemic has reminded us of the importance of being prepared for any emergency situation. In times like these, having a well-stocked emergency kit at hand can make all the difference between safety and peril.
This comprehensive guide will walk you through the process of building an emergency kit that caters to your specific needs and prepares you for various disasters. By following these steps, you’ll be better equipped to protect yourself and your loved ones when disaster strikes.
Table of Contents:
Assessing Your Needs and Risks
Essential Items Every Emergency Kit Should Have
Customizing Your Kit Based on Location and Personal Needs
Storing Your Emergency Kit Safely
Keeping Your Emergency Kit Updated
Conclusion: Taking Action Today
Section 1: Assessing Your Needs and Risks
Before diving into the world of emergency preparedness, it’s crucial to assess your unique needs and risks based on factors such as location, family size, medical conditions, and potential emergencies in your area.
To do this:
Research the most likely natural disasters or emergencies in your region (e.g., tornadoes in Tornado Alley or earthquakes in California).
Consider personal factors such as family size, age of family members, pets, special dietary needs or allergies.
Create a list of potential scenarios that could occur in your area (e.g., power outages during a storm or evacuation due to flooding).
By identifying these risks ahead of time, you can tailor your emergency kit accordingly.
Section 2: Essential Items Every Emergency Kit Should Have
While every emergency kit should be customized to fit your needs, there are certain essential items that should be included in all kits. According to FEMA and the American Red Cross, these basic supplies include:
Water: At least one gallon per person, per day for at least three days.
Food: A three-day supply of non-perishable food items (e.g., canned goods, granola bars)
Battery-powered or hand-crank radio
Flashlight and extra batteries
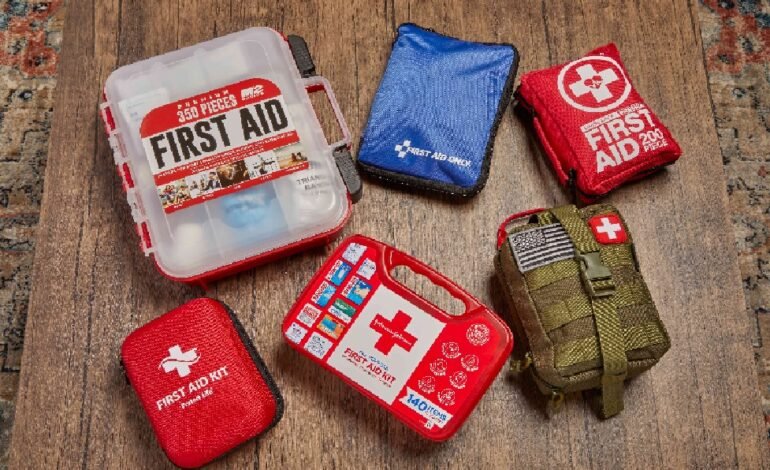
First aid kit including band-aids, gauze, antiseptic wipes, and pain relievers.
Whistle: To signal for help during emergencies
Dust mask: To protect against contaminated air in case of a disaster or pandemic
Plastic sheeting and duct tape: To create a makeshift shelter if needed
Moist towelettes, garbage bags, and plastic ties: For personal sanitation purposes
Wrench or pliers: To turn off utilities if necessary
Can opener: For opening canned food items
These essentials serve as the foundation of your emergency kit.
Section 3: Customizing Your Kit Based on Location and Personal Needs
Once you’ve gathered the essential items listed above, it’s time to customize your kit based on your unique needs and location.
Consider including:
Clothing appropriate for your local climate (e.g., rain gear for wet regions or warm layers for cold climates).
Additional water and non-perishable food if you live in an area with limited resources or frequent disasters.
Pet supplies such as pet food, extra water, leashes, carriers, etc.
Prescription medications and medical equipment (e.g., insulin pens or inhalers) if applicable.
Extra glasses or contact lenses if needed.
Copies of important documents such as passports, birth certificates, insurance policies stored in a waterproof container.
Cash in small denominations and coins for phone calls, vending machines, or other emergencies.
A spare set of keys for your home and vehicle.
A list of emergency contacts including family members, friends, and local authorities.
This customization ensures that your emergency kit caters specifically to your needs in case of a disaster.
Section 4: Storing Your Emergency Kit Safely
Proper storage is crucial to ensure the longevity and effectiveness of your emergency kit. Keep these tips in mind:
Store items in airtight plastic bags or waterproof containers to protect against moisture and pests.
Choose a cool, dry place to store your kit away from direct sunlight or extreme temperatures.
Divide items into smaller kits based on categories (e.g., food, first aid) for easy access during an emergency.
Consider having multiple kits stored in different locations such as your home, car, office or school.
By properly storing your emergency kit, you can rest assured knowing it will remain intact when needed.
Section 5: Keeping Your Emergency Kit Updated
To ensure the continued effectiveness of your emergency kit:
Replace expired items such as food, water, batteries and medications regularly.
Update clothing sizes for growing children or seasonal changes.
Review important documents annually to ensure they are up-to-date.
Revisit your list of potential risks and adjust your kit accordingly if necessary (e.g., adding items after moving to a new location with different hazards).
Regular updates keep your emergency kit current and ready for action when disaster strikes.
Conclusion: Taking Action Today
Building an emergency kit might seem like an overwhelming task at first glance. However, by following this step-by-step guide and customizing it based on your unique needs and risks, you’ll be better prepared to face any disaster head-on.
Remember that preparedness takes time – don’t wait until an emergency is imminent to start building your kit. Start gathering supplies today so you can have peace of mind knowing that you and your loved ones will be safe when disaster strikes. Don’t delay, take action now! So, be proactive and start preparing your emergency kit today. Remember to keep it updated and easily accessible in case of an emergency. Your preparedness could make all the difference in a time of crisis. Stay safe and stay prepared! Additionally, don’t forget to regularly check your local government’s emergency preparedness guidelines for any updates or changes that may affect your kit. Stay informed and always be ready for any situation. Remember, being prepared can save lives. Let’s work together towards a safer future for ourselves and our communities. Take action today!
Read more: https://newpawsibilities.com/


